Sunday, November 8, 2009

Long Time NO SEE but not NO SEED

As you may have ascertained from the title, I have been beading but not blogging. I started a project in September as we traveled to PA for our annual Doctor visits. It has been taking a while and I have started a few in between projects when I needed a break. (I will blog them later)

Let me start at the beginning. To explain the project I need to give a little background. I belong to a "Club" that is called the "Divas". I believe the best way to explain Divas is to say we are a little too young at heart to be Red Hatters. Although some of our members are also Red Hatters and love that too. Each month one of the members is Queen Diva and she is responsible for the activity. The Queen can decide if we are staying in the Clubhouse or venturing to another location. She is also responsible for a snack if we are not going out to lunch. If we go out for lunch the cost is not covered by the Queen. We wear pink clothes and pink boas and carry a pink and green decorated bag to tote our boas...they tend to get itchy and so we can put them away when necessary.
I volunteered to be Queen for December. I am dressing in a long large pink dress...Mrs. Diva Claus. Instead of the members bringing a gift for exchange I am supplying the gifts for each member. They must however buy their gift for $5 which I will donate to our Relay For Life Team. Each gift will be wrapped differently in different size boxes and bags. However, each will be a pink beaded bracelet created by me with a Diva charm. Each of the bracelets will be a little different with a different combination of pink beads. The beads are size 11's and 15's in different combinations. The Diva Charm is attached a little differently, too. At present I have 14 completed bracelets. I am about 1/3 finished with number 15. I have decided that I will continue to make the bracelets so new members, as they join, may purchase one. The price will always be donated to Cancer charities.
Bracelets in Progress-
A little closer look!

When the members arrive at the December meeting they will get a number. According to their number they will have the chance to select their gift. During the selection process if a member wants a gift already selected she may take it and the person she took from will select another from under the tree. Once everyone has selected their package we will open the gifts at the same time. Each bracelet is about the same. There is a slight difference in size. Once everyone has opened their gift we will have an opportunity to trade. Anyone wanting to trade will have to negotiate to trade with another Diva.
Already for Wrapping


I am hoping that it works like I have it envisioned.
All wrapped and ready to take to the Party!

I will let you know if they liked them and if it worked like I expected- or NOT!


Sunday, August 23, 2009

Flamethrower Revisited...new additions.

Well I have been so darn busy enjoying my new community that I have not paused for even a minute, in more than a month, to update this blog. Florida is truly a wonderful place to call home. However it does keep us busy.

The Flamethrower bracelet that I finished some time ago has generated much interest as it must appear to be of some kind of material that would be soft so people who venture a touch are somewhat surprised to feel the glass bead feel. The weight is also a bit of a surprise to me too.

The bracelet really needed a go-along touch and a necklace would have taken way to long to create and been overwhelming also. So the earrings have been a thought since the bracelet was completed. Exactly how to create them was the reason they did not get started before now. To be honest I was about over fringe for awhile! I had drawn up three different designs and none of them seemed to be what I really wanted. A few days ago I got the base color size 11's out and started to play with them. The base ended up being a rectangle of 19 rows by 10 beads a row of even peyote. The sterling silver earring wire was hung unto a corner at the red end so the earrings would hang on an angle and hopefully display the fringe colors to the best advantage.


The second earring base is not complete in this picture.


There are 7 more rows to be added in darker and darker reds.


The first earring has been completed and now to try it on. I am about half afraid to try it for fear I will not like it. Since I generally wear a moderate gold hoop, these are going to be over the top for me. If they do not hang right I know I will not wear them. Yes, I will be very disappointed! Wish me luck...

Done!

Saturday, July 11, 2009

A Gift for Shari


Some people you meet you like right away. It is especially easy when that person does kind things for others. The first kindness was a gift for Harv. The second was for our community. She makes it a point to make us smile and enjoy ourselves. And it is always a pleasure to see her with her parents, the love is obvious. This is Shari and Shari collects elephants. And Deb makes bracelets...as gifts for people that she admires...but never with an animal within!


And so I start and restart and restart yet again. Darn that part that sticks out on the back leg...pretend it is a kneecap and move on!


See there is a stick out place on the picture I was working from...however it was created as a crochet pattern and bead weaving is just a bit different.


Miss elephant is done...well as done as she is going to be...now what?


The indented area is because I shifted from the black 11 Delicas to a 15 round bead. It worked well as I did not want the back of the bracelet to be as wide. I tried other options and ripped ripped and ripped some more.


The closure is a black snap that I found at my Mothers last summer. Smaller than the ones on the Flamethrower bracelet but also vintage.


Viola! Finished! It is not the most perfect elephant, but it sure is a one of a kind gift. Thanks Shari for being such a neat person! (Oh I will leave it on your doorstep before I leave for Las Vegas!)

Saturday, June 13, 2009

New and Different!


Well this is a little different for me and has been sitting around waiting to be finished since forever. I did the Cellini Spiral months ago but did not want the whole bracelet in it.
http://www.tarnhelm.com/NeedForBeads/Cellini.htm However I was stumped about what I did want to do. I simply changed to my standby Russian Spiral. I used only the smaller two sized beads. The 11 and 15 and it made the bracelet more flexible. The bead at the end is a piece of turquoise that my sister in law gave me when her daughter made her a super necklace. The loop was a little large so I modified it to be arrow shaped and that seems to help. The first time I wear it I will know if I really did correct to too large opening.

I now only have one long time on deck project and it is with square Swarovski crystals and tiny gold beads that I am making into peyote rings to hold the open square crystals. I think it will have to be a gift as I would need one more crystal to make it large enough for my wrist.

It will have to be someone very special as it takes forever to make the darn rings.

Now for the fun stuff...My daughter Jessica and her kind husband Michael and baby boy Jay took me kayaking with them today. I absolutely had a ball. What a great couple to include the old lady and I am the one that make the baby cry...awe. How fortunate that they have 3 kayaks. I do recall that Michael mentioned that he needs to sell one of the kayaks...could that be a hint????

Tuesday, June 9, 2009

Pics and Tips for Russian Sprial Pattern!


So You want to learn the simple weaving that makes Russian Spiral both easy and beautiful. I will try to help with a few pictures and some tips that I have gathered in the last year or so. These are the tips that help me. You will come up with some of your own as each of us have a little different technique of putting needle to beads to create this pattern.
(Click on the pictures for a closer look!)


First decide on the color and combination of sizes you wish to use. I would recommend that you start with two distinctively different colors as well as two different sizes. The smaller size should be the two beads in a group that calls for one large and two small repeated throughout the length of the bracelet or necklace. My selection here is larger lighter green and smaller darker. They are 11/0 for the large and 15/0 for the small. You may wish to start with an 8 for the large and 11 for the small if you think it will be easier for you to see where to insert the needle as well as a faster finish! (I always suggest that you use a good glass bead so the sizes are more likely uniform and the final product is worthy of the time you will spend.)


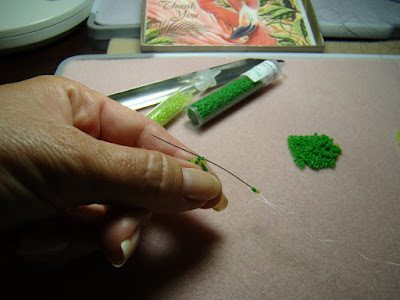
I am using 4# Fireline fishing line and I get mine at a sporting good store rather than a bead store as the product is the same and the price is about half! I start by threading a #10 or 12 needle. I use one light (11) and two dark green (15) beads three times on the thread.


I leave about a 10 inch to 12 inch tail of thread ( to attach my finding when I am finished) and tie a knot to form a circle. I run the needle through the next small bead to the knot and carefully pull the thread through. Careful not to tangle the thread as I have about 2 to 3 yards on the needle and it is single strand sewing/weaving.


We are ready to weave now. If you are right handed you will work from right to left or counterclockwise with the needle. If you are left handed you will work from left to right or clockwise. Place one large and two small beads on the needle and insert the needle in the first small bead beside the large to your left on the circle of nine beads.. It will take a little manipulating of the needle and bead to get it inserted. As you add the three beads each time you will insert the needle in the next small beside large working around the circle. After you work the first three groups you will have a spiral that is flat. Continue to do another round in the flat as that will help keep your place make certain you are working only in the outter most round and adding the three beads and inserting the needle into the first of the two small beads beside the larger working left.


I hold the work between my thumb and index finger to keep it flat as I draw the thread through carefully...tangles do happen and take some patience and two needles to get undone sometimes.


When I have a total of 27 beads added in a flat spiral, I am ready to tighten up the work and bring it into a tube of woven work. I hold the tail end of the thread around my little left hand finger and start to tighten up and draw the beads around to form the spiral tubular look. It takes a little work to align them so that there are three large as you look down on the third round of beads. I tend to squeeze them with my thumb and index and roll the beads back and forth to help align them...confused? It makes more sense when you are doing it than reading honest!


Notice the three large beads visible on the top round.


It makes for a finer product if you keep your work tight. I do the rolling of the beads as I apply pressure to the end of the thread to continually tighten up my work. As you bead this pattern it will get better each time until is it all very uniform and snug and lovely!


It is time for the boring part of continually adding the three beads and weaving them in as you build your bracelet.


Where did that end come from and why did I not photograph the process and the stages. Stupid that is why. I forgot and well what can I say? However I do both ends exactly the same so when I finish off the bracelet I will do the step by step of attaching the findings. (fasteners)

A quick comment about the SS Flamingo that is attached. We are the Flamingo House and thus my signature charm

When the bracelet reaches approximately 6 1/2 inches long I make my final round. The final round I do as one large and one small only three times. That is 6 instead of 9 beads for the final round. I snug the up tightly and insert the needle through a few more beads in the round and knot it securely.

.


Next step is the same as I did for the attached toggle. I start with a large bead, a small, a second large and a second small. Then I run the needle through a quarter inch of French Wire. (French wire is available in gold tones and silver tones in real or not metals. It is really a coil of thin metal that is a protection for the thread so the findings do not wear on it.)


I finally add the lope end of the finding in this case a heart shape in sterling silver, then I thread the needle through the small bead again. I add the second leg of the holding by adding another large bead, another small bead, and a final large bead...four beads each side of the leg if you count the shared small one right before the French Wire was added.


I knot this leg to the top of the bracelet on the opposite side from the first leg. I then run the needle through 4 or 5 small beads down the bracelet and knot again. I do that again so there are about 3 holding knots. I then run the thread a few more beads down and then trim off the thread and I am DONE!

Friday, June 5, 2009

Flamethrower Final Edition...I think!


How long did I work on that bracelet and why did it take so darn long you ask? Well, it was a lot of beads to sew together. It probably took between 50 and 70 hours. And I do have a life you know...kind of!


The snaps were part of the "finds" from my parents house last summer. I am thinking that Mother used the other two on something years ago...the price was 10 cents for the pack!

Wednesday, May 20, 2009

Rain Rain Go Away - Enough Already

I know, I know, we need the rain! I am so spoiled by the sunshine. When it is not here I complain.

The rain brought some welcomed guests to our pond. They had not been here in a long time.
I took the picture through the bedroom window as I did not want to disturb them.

The Wood Storks


In the last week we have had some other feathered visitors. We have been hearing them call "Bob White" for weeks and have seen a pair about a block from our house. I do not think this is the same pair we had seen but who can tell. They were busy eating near the back door.

Bob White Quail


Now these visitors kind of worried us. We checked each others pulses and they were fine. It was a hot day and both had a drink from the pond and a rest under the maple tree and then flew away. Not before he checked to see if she was interested in him. She said "No"!

Turkey Vultures


Did you think with all this bird watching I was not beading? Well you are partially right. I do lots when I go to Arts and Crafts at the Club on Tuesday mornings, but not so much at home or it would be done by now.

I did do a darling white Russian Spiral bracelet for a friend.
That meant not working on the Flamethrower. (May rename it "Sunset" what do you think?)

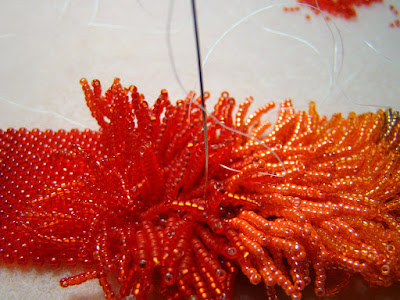
The needle below shows a mistake that I found on Monday night. I am not sure if I will tear out and repair or forget it as it is almost impossible to find. One of fringes caught two others. I cannot tell if the thread caught around the two or if I actually ran the needle through beads.

What would you do????


Hope your day is a sunny one no matter what the weather!

Wednesday, April 29, 2009

Fringe Fringe and More Fringe!

The fringe is going to take forever but it is growing on me! Each fringe has 13 size 15/0 beads. I am using two colors for each peyote base color.


As I begin the 5th color of fringe.

On to fringe color number six...orange.


This close up gives a little feel for how many fringe sections there are already. Worked on the orange at Arts and Crafts at the Club on Tuesday. It is almost time to start the next color.


Speaking of color...could I ever create something in beads to rival my favorite orchid in full bloom?

Double clicking on any picture should enlarge it. Enjoy.

Tuesday, April 14, 2009

Flamethrower and More


The sun's flame in the sky is more beautiful than anything I can create.


However I continue to try!

Sunday, April 12, 2009

Back to Bead Heaven - The Flamethrower

For the longest time I have been envisioning a bracelet with colors ranging from bright yellow to crimson.


It is only the beginning and already I am seeing the end product...kind of.


This seems like a slow process. I did manage to take it along to Arts and Crafts to share with the other crafters that live in my new community.


This has been a long ordeal and I have just begun with the fringe. I have a few more colors in the 15/0's that I am using for the fringe. I am not certain how I will blend them all. I think it will definitely end up a Flamethrower!


Keep posted I will update as the colors change. (Does this sound like the ad for Bealls Outlet?) No time to work today...Happy Easter and I am off to cook and bake to try to dazzle the family.

Monday, March 9, 2009

House in Florida to Sell NOW!


It seems like all we have done is move and clean out houses this past year. Now that we have moved to DeLand, we have to sell our house in Orange City. It is by far the most fun house I have ever lived in. I love this house.
It is a 1995 Jacobson manufactured home. It has two bedrooms and two bathrooms. There are more cupboards and built ins than anywhere I have ever lived. The closets are large with sliding doors. The master bedroom's are mirrored.
There are ceiling fans in all the rooms even in the kichenette/dinette area.(whoops not in the baths and kitchen only exhaust fans in them)
The whole front of the home is a Florida room but it is not a built on it is within the home itself. The home measures 26 feet wide by 56 feet long. We had a new shingled roof put on two years ago. There is a built on very large sun deck that is a screen room. There is also a car port and an attached shed/golf cart garage.


Yes I had the biggest flamingos.


Queen sized sleeper sofa that is new and is being sold with the house. It is in the dining room/library/den/computer room adjacent to the kitchen
. Sofa stays with the house.


View from the sleeper sofa room to the living room/Florida room in the front. The sofa leather recliner coffee table and end table also stay with the home.


Guest room. Bed does not stay.


Masterbedroom. King bed does not stay.


View from the front room through the kitchen. Sky light in kitchen and master bath gives wonderful natural light. The refrigerator is a year and a half old, dishwasher is less than a year old and the stove is 3 and a half years old. The 4 bar stools also stay with the home.


The master bath has a jacuzzi garden tub and also a large walk in shower with seat.


The home is in the Country Village 55 + retirement community. It is a great community with wonderful people. There is an active HMO with many activities. The pool is heated and great. There is also a hot tub at the pool. There was a golf course at the community but now you have to drive about 4 miles to the closest course. The community is rental lots and it is well maintained and the yard work is supplied. Garbage is collected twice a week and the yard waste from any bushes or trees is picked up once a week. There are about 400 homes in the community. It is adjacent to a RV park. It is about half way between Daytona Beach and Orlando. About 35 minutes to the beach and 50 minutes to Disney.

I almost forgot to mention that there is a laundry room when you enter from the screened deck. It has oodles of cupboards and a washer and dryer that stay too. The airconditioner/heat pump is about 4 years old.


If you want to live in this house it will cost you $63,000 for the home plus lot rent only 342 a month. It is a super house. It makes you smile!